RTP-MIDI over the Internet
RTP-MIDI over the Internet
RTP-MIDI, AppleMIDI or MIDI over Real Time Protocol is a way to send midi over a network in real time. Most of the time it is used to send midi within a local network to either hardware or software instruments but it can also be used to send midi over the internet. However, the timing is not always perfect. In my experiments, RTP-MIDI over the internet back to another local computer I experienced occasional lags, which got worse as I visited new web addresses that were data heavy like a YouTube video, but the lag went away a few seconds after the video got started.
It is always better to just send midi files via email to work on projects that will have perfect timing. Regardless, sending midi over the internet in real time seems like a fun idea. You could maybe, for example, play all of the synths here at Deep Signal Studios over RTP-MIDI! This post serves as my notes as I learn what is possible. I could not find a lot of info on the web about doing RTP-MIDI over the internet, just local networks, so I hope this article might help people.
First and most importantly you need to open the ports when connecting RTP-MIDI over the internet (not necessary for local networks). It can get a little complicated when sending over the Internet since both ends of the connection need to open ports. Both side (you and the other remote studio) need to open ports 5004 and 5005 on their routers. On Linksys routers this is done under Single Port Forwarding. Create two port forwarding entries, one with the internal and external port both being 5004 on one entry and both ports being 5005 on the other entry. When you specify the port number in the Apple’s Core Midi Network panel it defaults to 5004. It also uses the next port number up which in this case if 5005. The first port is used to open and close the session and the second is used for the actual data. Place the last part of your computer's local IP address in the Device IP# fields. 16 midi channels can be sent or received on each session just like in hardware midi. It is possible to open multiple sessions, giving you another 16 midi channels. Or, a second session could be from another local network or internet address. Each RTP-MIDI connection is bidirectional so it will always appear as both an input and an output.

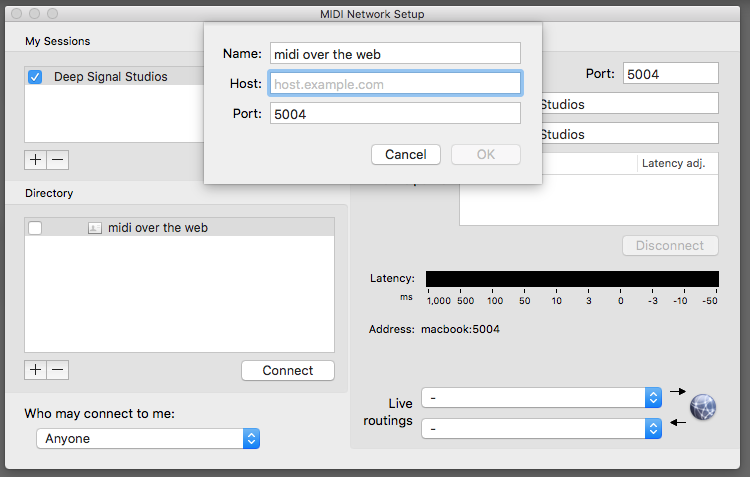
On MacOS the Audio Midi Setup app is in Applications/Utilities folder. Open it and then go to Window > Show Midi Studio if the window is hidden and then double click on Network. Here is a nice video that shows you how to setup Network MIDI on a local network but also it has great advice on how to start and name Sessions, local machines, and the Bonjour name (name them all the same). The session will appear in a sequencer as midi sources and destinations (Ableton Live Midi preferences appears in the image below). Live Routings (lower right corner of the larger image below) allows you to send midi to or get midi from sources such as hardware midi interfaces without having to launch a sequencer.

Make a new Directory and enter the IP address of the other studio you will be connecting to and click connect. It is ok to set "Who may connect "to anyone since it's just midi data.
For Windows you can use Tobias Erichsen’s implementation called rtpMIDI and ravelox on Linux which is run on the command line and does not have the UI that Audio Midi Setup and rtpMIDI have. So the easiest way to uses ravelox if you have to is to initiate it on a Mac or Windows PC. I have also played with McLaren Lab's rtpmidi app for Raspberry Pi or Ubuntu Linux which will give you a similar graphic UI as OSX's Audio Midi Setup, making a local network connection with a Raspberry Pi with a USB midi interface and a Mac and sending midi in either direction.
Update 7/30/2020: Sick James has created a video tutorial.
Update 12/10/2020: Nick Batt at Sonic State used our guide to set up RTP Midi over the Internet and made a video also.